When it's the first full weekend in May, every fiber fanatic knows what that means: it's time for the Maryland Sheep & Wool Festival!
Everything at the Golding booth is a piece of art -- a feast for the eyes and nourishment for the soul.
The craftsmanship that goes into each piece is just breathtaking.
I didn't set out with any "must buy" preconceptions this year. However, when I got to the Bosworth booth, all of these spindles just started singing my name.
Those creamy white spindles are made with moose antler. They're a bit out of my price range, but that doesn't stop one from dreaming, right?
I was happy to see that the folks at Bosworth are customers of Moo! Where else can you buy business cards with a different image on each card? I'm in love with Moo.
Before I left the Bosworth booth, I took a long, hard look at this specimen of engineering genius. Love it!
And there's The Lovely Stacey (back to camera), who thought long and hard about what spindle she was going to add to her collection. She made a great selection ... of course.
This booth was full of Shaker artistry, as well as the luscious scent of wood polish. It took me back to my father's basement workshop. He was always crafting something wonderful with wood, and that scent of polish can trigger a flashback like no one's business.
This is about half of the fleece sale area. One year I might just have to buy a fleece, no matter how hard I'm sure it is to choose (just one!).
The festival has all sorts of things that I just can't live without. I vow that I will make myself a rolled brim hat of my own one of these days.
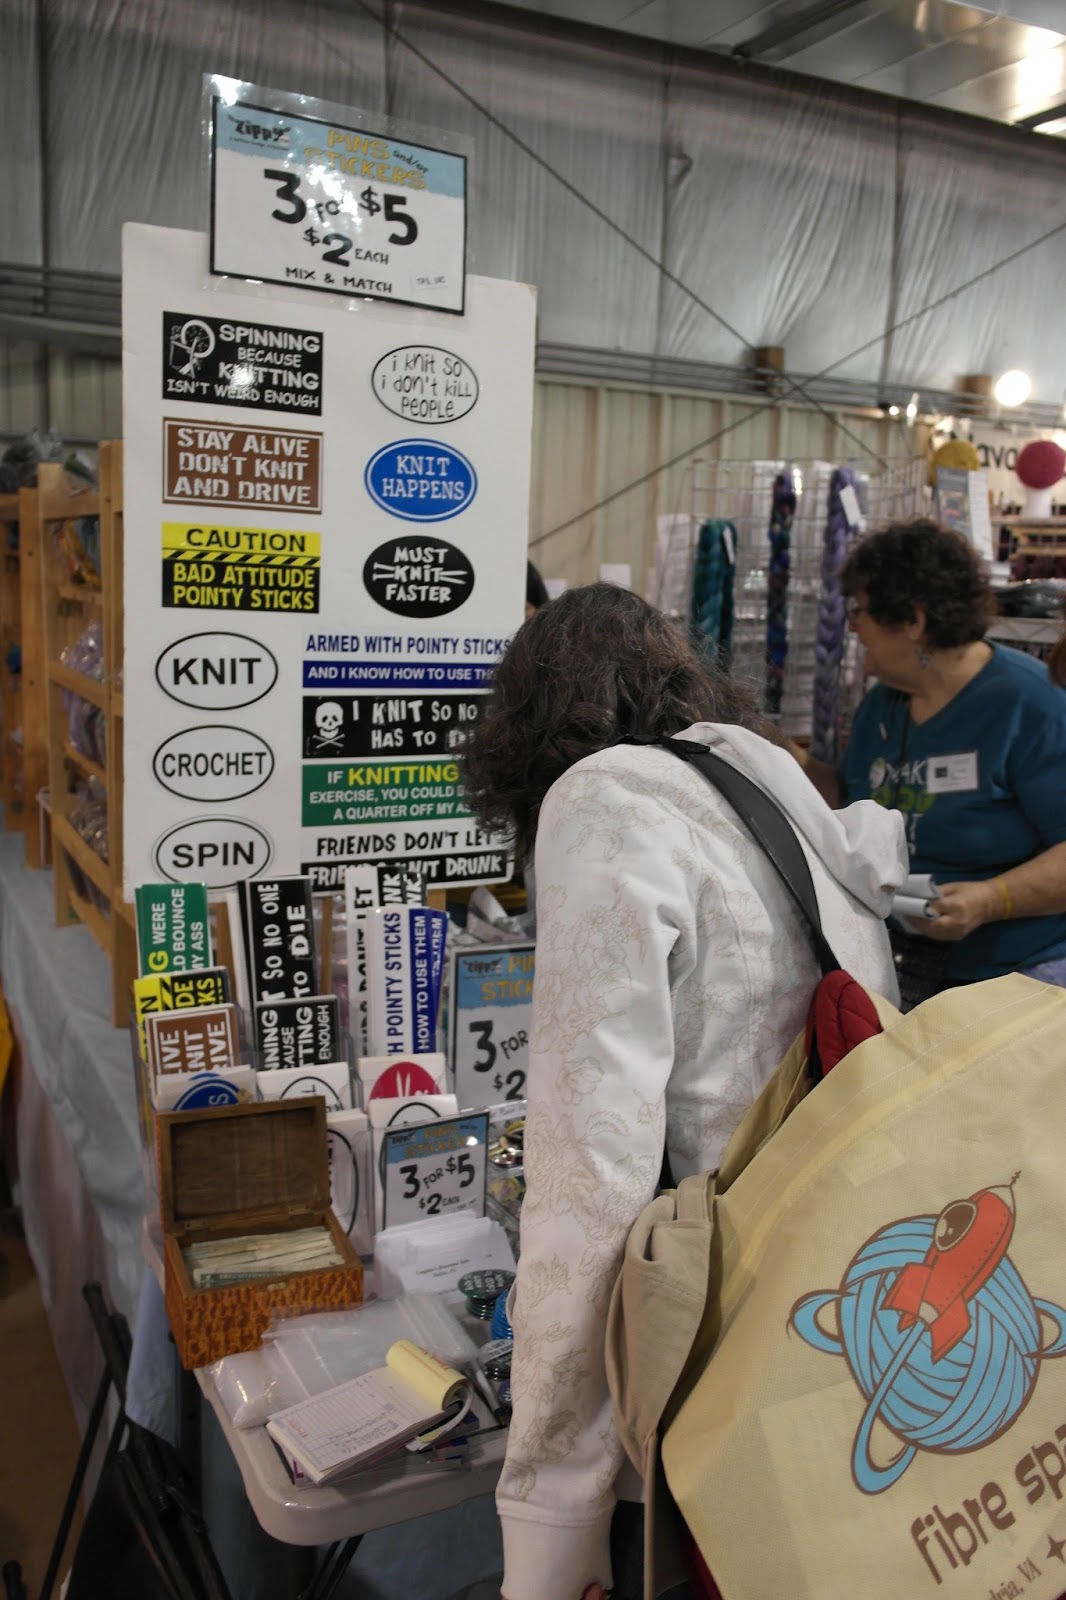
This was a very popular spot. I really want to add a "I knit so no one has to die" sticker to my car.
No, wonderful vendor. Thank you!
One of my favorite parts of festival was visiting all the livestock, like this wonderful guy. His name is Moe -- seriously.
Oh, and the lambs! I just wanted to climb right into the pens and cuddle each one.
Oh, you lovely sheep! I gave this guy or gal lots of skritches and ear rubbing. It was very hard to walk away from all the love.
Note to self: Find this book.
I've seen pics like this on the interwebz, but I thought they were Photoshopped. Sadly, this is what some shepherds have to do to convince thieves to keep their mitts off sheep that don't belong to them.
I desperately need a haircut. This gal was quite skilled with the clippers. Hmm ... naaah!
Hello, Deb Robson! She's the coauthor of The Fleece & Fiber Sourcebook.
This kind of mind-blowing array of color and texture is everywhere at the festival. It can easily become overwhelming.
Say hello to my little friend. I do believe that this wheel will be part of my future.
Glad to see that I'm not the only one who doesn't always look my best in pics. Derp!
See that guy in the kilt? Well, that's none other than the handsome, talented, and crazy-smart Brewergnome! I stepped outside my comfort zone and actually introduced myself to him. (He's kind of like a fiber rock star in the LSG group on Ravelry.)
The Lovely Stacey was one happy camper with her new spindle and color-coordinated fiber.
By the time you've finished tramping all over the fairgrounds and are ready to find your car, this guy and his trailer comes along to make the trek just a little easier.
The weather was sunny and cool. The companionship was wonderful. The festival-goers were friendly and numerous. The food was messy and delicious. The day? The day was perfect.
Showing posts with label fiber. Show all posts
Sunday, May 5, 2013
Tuesday, October 16, 2012
Indigo blues make me happy
On Sunday, a bunch of FiberGuild members descended on Linda's house to brew up a batch of indigo. In the spring, I gave Heather and Natalie some Japanese indigo seedlings for their gardens. They donated their leaves to the effort, and I sacrificed my entire patch.
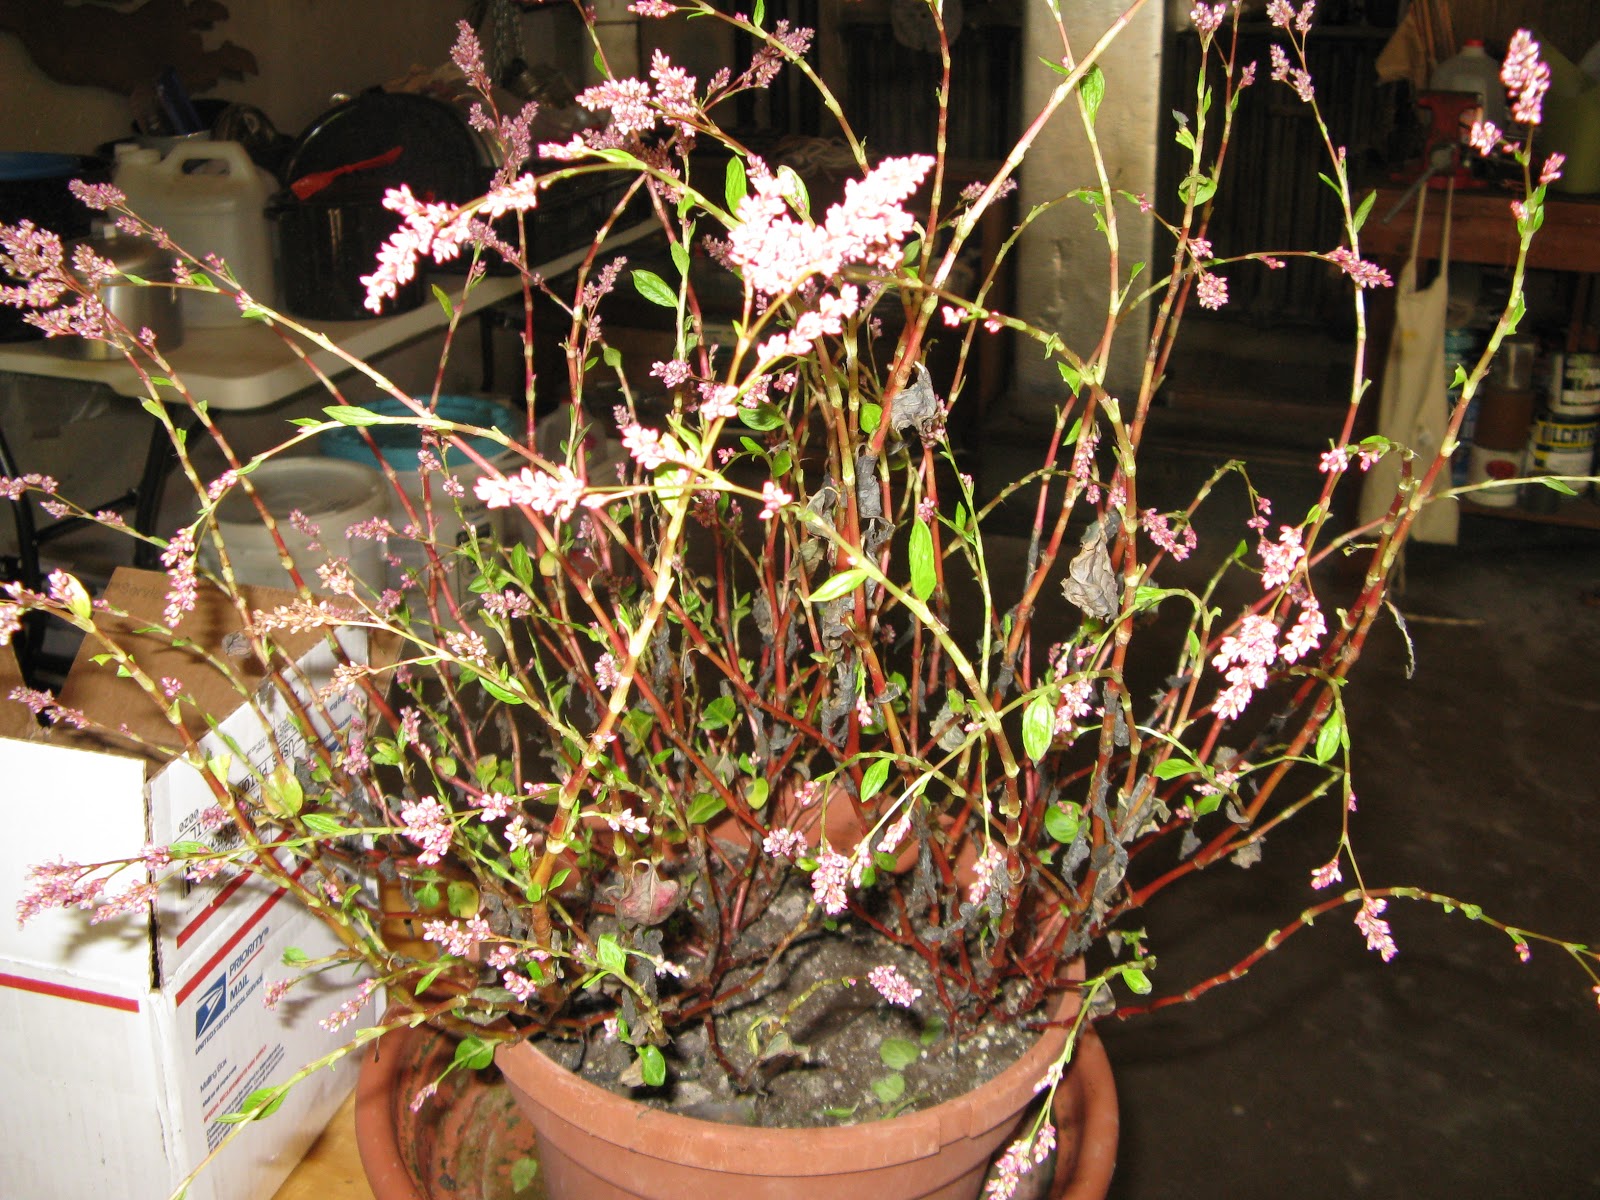
This is Heather's pot o' indigo, freshly denuded of leaves.
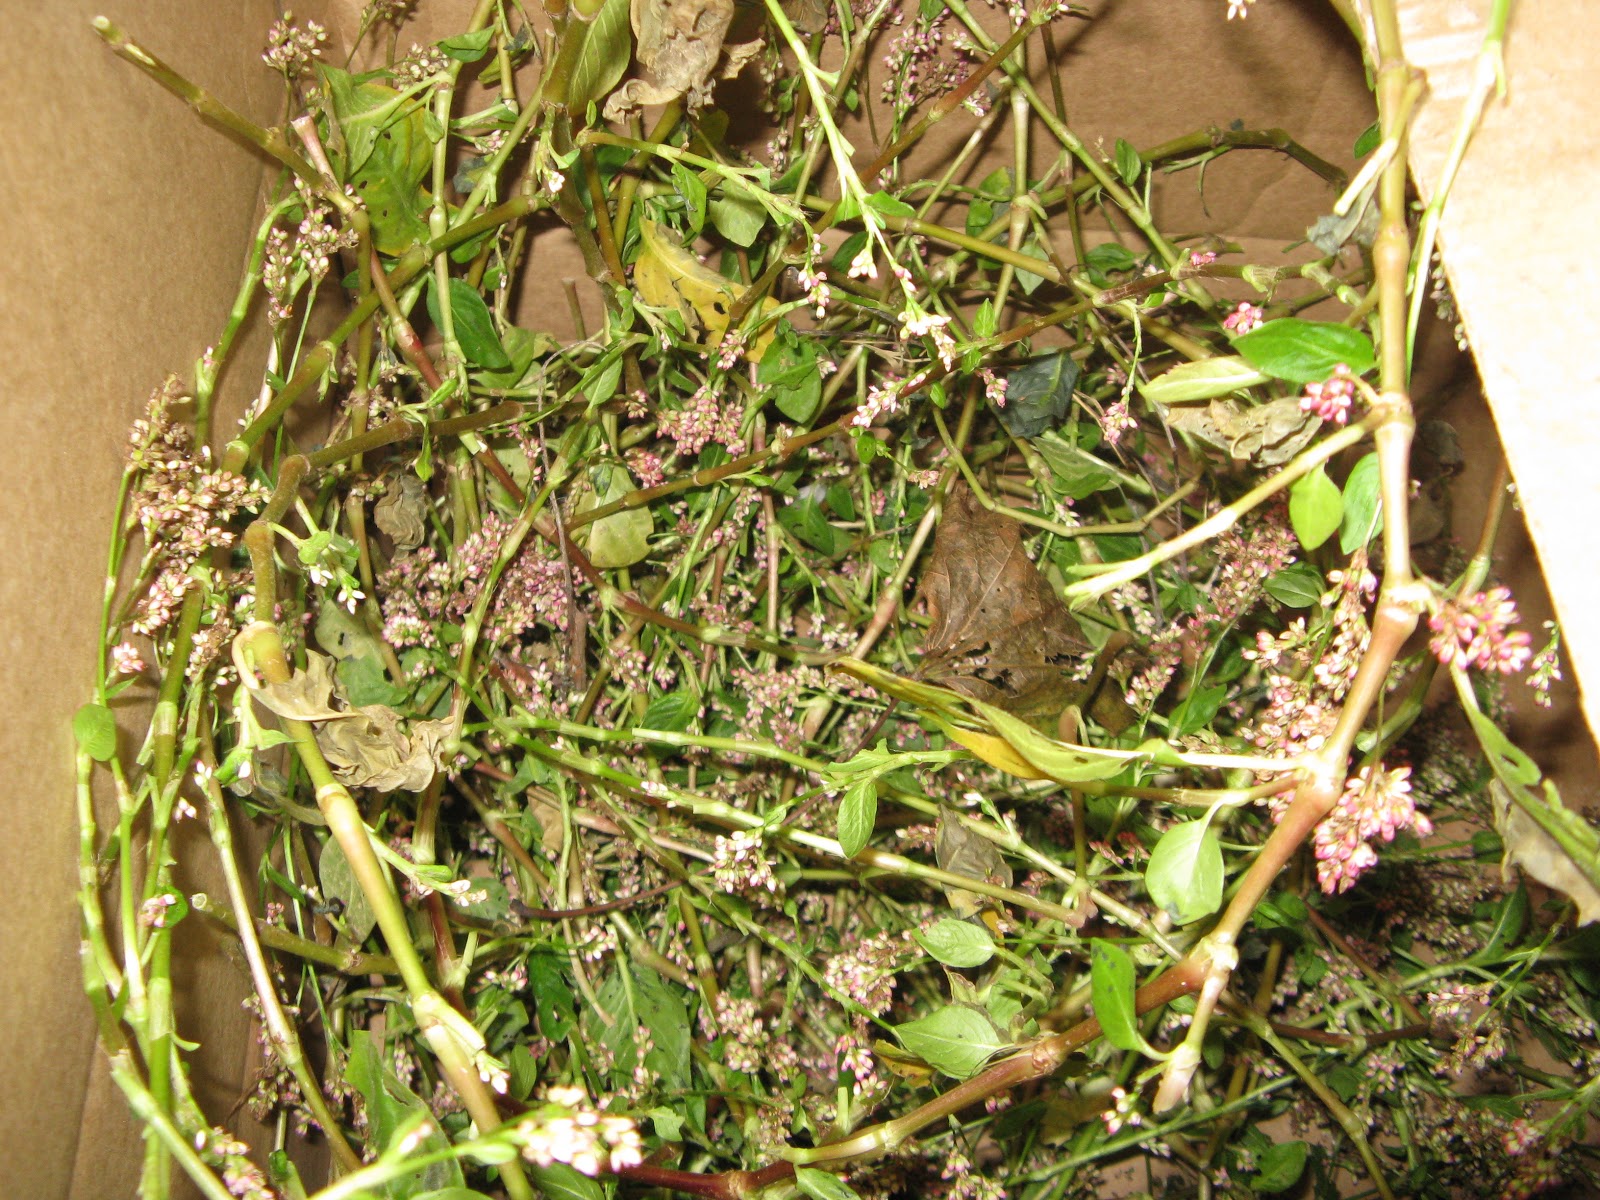
Here's what's left of my contribution. Kind of sad looking, no? Later I went over each stem in the box to capture as many seeds as I could so that those of us who want to grow indigo next year can. Right now the seeds are on a cardboard box on top of my dryer, drying out so that I can clean out all the stems, leaf remnants, and other detritus before dividing up the seeds.
And here's our pot o' leaves. Such excitement! Let me show you why.
This is a jar of indigo ... slurry? ... that Carol brought.
Mmm! Check out that color on the glass and on the scoop.
Linda put a damp skein of natural fiber into the jar.
She gently pushed it into the goo to make sure every fiber was saturated.
In less than a minute, Linda pulled her skein out. You can just see it starting to turn blue as the oxygen hits it.
This is Heather's pot o' indigo, freshly denuded of leaves.
Here's what's left of my contribution. Kind of sad looking, no? Later I went over each stem in the box to capture as many seeds as I could so that those of us who want to grow indigo next year can. Right now the seeds are on a cardboard box on top of my dryer, drying out so that I can clean out all the stems, leaf remnants, and other detritus before dividing up the seeds.
And here's our pot o' leaves. Such excitement! Let me show you why.
This is a jar of indigo ... slurry? ... that Carol brought.
Mmm! Check out that color on the glass and on the scoop.
Linda put a damp skein of natural fiber into the jar.
She gently pushed it into the goo to make sure every fiber was saturated.
In less than a minute, Linda pulled her skein out. You can just see it starting to turn blue as the oxygen hits it.
She smooshed out most of the liquid back into the jar. Waste not, want not, right?
Just look at that color! And that's after very little time at all in the indigo goo. Swoon!
Meanwhile, our leaves were heating up. I don't "do" indigo dyeing unless someone else is there to take responsibility and tell me what to do. I don't do well with measuring, recording, and the like. I'm definitely a seat-of-the-pants dyer, and you can't expect to succeed with indigo if that's your approach.
While I was off playing with one of Linda's dogs, the gang had strained out the leaves, and this is what we had in the pot.
This is the lovely Stacey, our photographer extraordinaire and bright ray of sunshine. Hi, Stacey!
At some point in the process, you have to test the liquid's pH. Again, not my specialty. Anyway, if the liquid's too acid or basic (is that the right word?), you need to add washing soda. That's WASHING soda, folks, not BAKING soda. Big difference.
After the first tablespoon of washing soda was added, blue is starting to appear on the back of the spoon.
At this point, you need to remove the oxygen from the liquid. To do this, some people pour it back and forth from pot to pot; others give it a vigorous, constant stirring. What we did was use a bubbler. If you've ever had an aquarium, you know exactly what this is.
Bubbles are good!
Maisie, the younger of Linda's two dogs, was great entertainment while we were waiting for the indigo to reach the right temperature for dyeing.
"Pay attention to meeeee!"
That scummy film is a sure indicator that we're good to go!
Our very first indigo-dyed yarn! I didn't realize it until this point in the process, but neither Linda nor Carol, my go-to gals for all things dyeing, had ever made an indigo dyebath from fresh leaves. Nicely done, ladies!
Labels:
blue,
dyeing,
fiber,
Fiber Guild,
indigo,
Japanese indigo,
natural dyeing,
Ravelry
Thursday, September 20, 2012
Dyeing to dye with walnut hulls
It's that time of year again when walnuts are falling off the tree and into my greedy little hands. I love dyeing with walnut hulls because I don't have to mordant my fiber. Believe me, that dye will work on just about anything, unlike many (most?) natural dyes.
This was all I could find at Greenbank Mill on Monday. They're kind of battered, but that's OK for my purposes.
I pulled out my trusty soup pot, which is used only for dyeing. It used to be nonstick -- not so much anymore.
Next, I located my technologically superior bashing tool. Sure, I could use a hammer, but then I'd have to clean it up. Besides, with the larger surface area, it's impossible to miss whatever it is that I want to hit.
I have no idea how I managed to take this (i.e., it's sideways). It's also out of focus, which is probably a good thing. This particular nut has already begun decomposing. See those white lines just above my middle finger? Yeah, um, those are larvae of some sort. Alive. For now.
This shot is marginally better. No critters but still out of focus. My bashing tool deposited some of itself, but that won't affect the outcome at all. This nut is in really good shape. I prefer to use the nuts while they're still bright green and with minimal to no black spots.
Be sure to put the nuts out for the squirrels or chipmunks. Important safety note: put those nuts somewhere where the lawnmower won't turn them into lethal projectiles.
I should mention that it's really important to wear gloves while you're handling these nuts. Of course, if you don't mind black stains on your skin and under your nails, then go for it. Walnut hulls stain like crazy, which is one reason why I'm smushing them on the driveway. Another reason is that I'm too lazy to find something else to do it on (e.g., newspaper, an old shower curtain, etc.).
Here are all the hulls in the pot. Ideally, you should probably break them into smaller pieces, although, now that I think about it, I don't know if it matters, especially if you have a ready supply of walnuts. Don't worry if leaves, "helicopters," or some dirt winds up in the pot.
I'm good to go!
I took a stroll over to the wading pool (aka our dog's pool) and put some rainwater in the pot. You can see that already the dye is starting to leach out into the water. Excellent!
It's now the next day. Just so you can see the kind of color you might expect, I grabbed a small handful of grayish white Wensleydale and put half of the fiber into the pot.
Just look at all that dye!
Right out of the pot after about 10 hours of just sitting and soaking.
And this is how it looks after a quick rinse under running water. Mmm! A lovely orange-brown, which is exactly what I was going for. I've seen a lot of muddy (to me) browns from walnut hulls, but I got this surprising color last fall, so I knew the key: use those green hulls. Caveat: your mileage may vary. In other words, I'm sure it all depends on what kind of walnut hull you use, the condition it's in, and whether you heat the dyebath.
I'm an imprecise dyer. I prefer to just throw things around (safely, of course) and be surprised by what I get. I suppose it's a good thing I didn't go into a profession where precise protocols are required. Hmm ... although as a writer and editor, I do try to be precise. The difference must be that I don't have to measure and record data.
There you have it. Embrace dyeing with walnut hulls. Just remember to wear something you won't mind being stained!
Subscribe to:
Posts (Atom)